Cart (0)
Subtotal
0,00 €
By: Contributor Grow
Descarbo…what? This term may sound like double Dutch to any beginner in the cannabis world. That’s why in this article we would like to explain everything there is to know about this cannabinoids activation process and the need to enjoy all of these wonderful plant properties. Come and join us.
Decarboxylation is a chemical reaction that takes place when we heat cannabis and causes a molecular change in its cannabinoids. In a natural way, with the plant fresh, these are in their acid form, as in the case of THCA and CBDA.
These acid cannabinoids do not cause the psychoactive or therapeutic effects we love so much about marijuana. To do this, they must be activated by decarboxylation.
Decarboxylation is possible because these cannabinoids are thermally unstable and, by subjecting them to high temperatures, they will lose their molecule carboxyl group. It is composed of one carbon atom, two oxygen atoms and one hydrogen atom; it is also called the carboxylic acid group.
When this carboxyl group is released by heat, it does so in the form of CO (carbon dioxide). Active forms of cannabinoids, such as THC and CBD, are obtained in this way.
The marijuana decarboxylation temperature is between 100 °C and 140 °C and can take 30 to 60 minutes to complete, depending on the technique used. However, when combustion occurs when lighting a joint, temperatures are much higher, so the process is done immediately.
To carry out the reaction successfully and achieve a quality final product, it is advisable to keep intact the maximum of cannabinoids and other plant compounds, such as terpenes. The boiling temperature of THC and CBD is 157 °C and 160-180 °C respectively, so heat must be controlled below those limits.
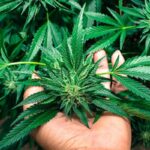
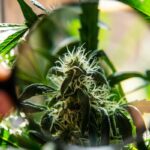
Naturally, while in the living plant, the buds will keep their acid cannabinoids in the resin formed by trichomes. When we cut these buds and put them to dry, however, the plant natural decarboxylation begins to occur.
Exposure of the buds to light and elements causes the acid cannabinoids to lose their carboxyl groups over time through the oxidation process. However, this process can take months and it is very difficult to control the outcome. So here are other more effective techniques that you can do at home.
Smoking or vaping marijuana buds causes decarboxylation of cannabinoids due to combustion and vaporisation, respectively, because through these techniques the necessary temperature is reached for this to happen.
However, many other properties of the plant are lost in the combustion process when we smoke marijuana. Due to excess heat, this form of decarboxylation is not very effective if we wish to benefit from all terpenes and cannabinoids of the plant.
On the other hand, vaporisers gradually heat the marijuana and manage to reach the terpenes and cannabinoids boiling point in a controlled way.
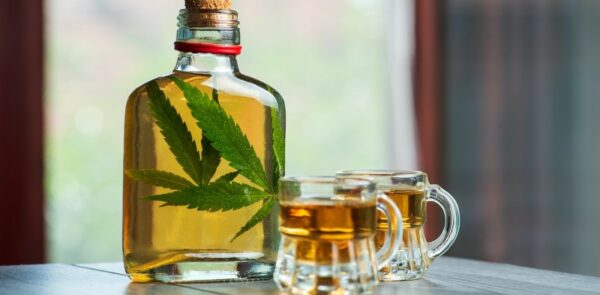
Increasingly, however, users prefer to consume cannabis in other ways, such as food intake, to take care of their lungs. Therefore, it is necessary to decarboxylate marijuana before ingesting. We explain below different methods to do it.
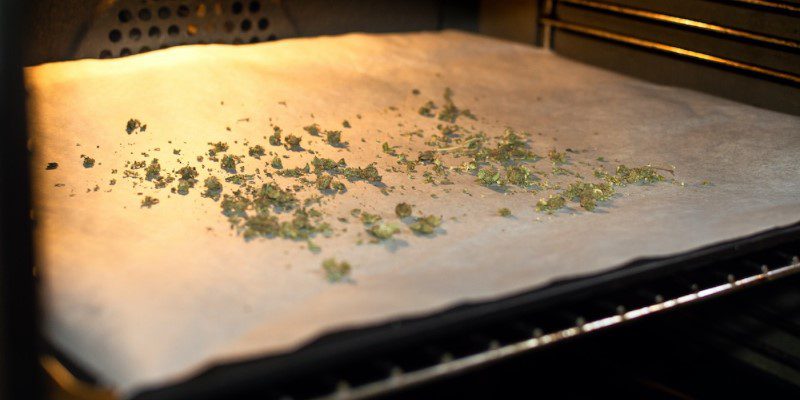
When using the oven in a laboratory, decarboxylation can be achieved in 30 minutes at 140 °C. At home, however, the oven temperature and the homogeneity of the grass are less controlled, so we will gradually go to a lower temperature:
1. First of all, remove the oven tray and cover it with baking paper.
2. Preheat oven to 115 °C.
3. Chop the cannabis flowers up and place them evenly on the tray.
4. Carefully place the tray in the oven and bake the crushed marijuana for 20 minutes at 115 °C.
5. Remove the marijuana carefully to ensure that all the pieces will receive the same temperature.
6. Let it bake for about 25 minutes. About 45 minutes in total.
This procedure works very well with dried buds, but if the buds are still fresh, they will contain more water, so the baking time will be extended to more than an hour.
You don’t have an oven? Don’t worry; you can also use your microwave.
This method is faster, but less accurate:
1. Grind the marijuana and get a homogeneous consistency.
2. Place in a microwave-safe container.
3. Program the microwave for 90 seconds at full power.
When you’re done warming up, remove the cannabis from the microwave and smell it. It shouldn’t smell burnt, but it should give off a strong aroma. If you think it’s not hot enough yet, since it hasn’t darkened and it doesn’t give off that distinctive smell, stir it up and program the microwave for another 60 seconds. Repeat at a lower temperature for longer if necessary. The important thing is to achieve decarboxylation without burning the grass.
If you’re looking for absolute control over the decarboxylation process, this is the best way of doing it. You can control temperature and time at all times, since a thermometer and boiling water is used, so do not exceed 100 °C and marijuana retains many of its properties intact.
1. Chop the marijuana up until you get a homogeneous mixture of crushed grass.
2. Boil a saucepan with water.
3. When the water boils, lower the heat and place a thermometer in the pan to make sure the temperature stays between 95 and 100 °C.
4. Put the crushed marijuana in an airtight bag, vacuum seal and put it in the water. Cook the cannabis this way for 60 minutes.
Although this method may take longer, its results are excellent and prevent the strong cannabis smell caused by the other forms of decarboxylation above described.
In all the recipes you can see a common element: the first step is to chop up the marijuana. This process guarantees a homogeneous decarboxylation. You must chop up and crush the buds to achieve the best results, whatever method you choose.
Now that you’ve managed to activate their precious cannabinoids, how do you preserve the herb? Very easy, put the marijuana in a glass container and store it in the fridge. This will keep it fresh and ready to use in your favourite recipes. Bon appétit!
Kannabia Seeds Company sells to its customers a product collection, a souvenir. We cannot and we shall not give growing advice since our product is not intended for this purpose.
Kannabia accept no responsibility for any illegal use made by third parties of information published. The cultivation of cannabis for personal consumption is an activity subject to legal restrictions that vary from state to state. We recommend consultation of the legislation in force in your country of residence to avoid participation in any illegal activity.


Growing cannabis is a process that requires dedication and, above all, patience. This is well known to experienced cannabicultors since, once they harvest, they must wait for the buds to go through ...
You feel that without coffee the mornings would be impossible to handle; you like to have a drink on the weekends and you sometimes use melatonin to help you sleep better … ...


Kannabia Seed Company sells its customers hobby (collection) seeds for personal use. Its germination and cultivation is prohibited. The buyer undertakes to consult the legislation in force in his country of residence to avoid incurring in the performance of an illegal activity.
Iberian Peninsula express shipping
0€ Orders over 60€
*6€ orders under 59€
East, West, South Europe express shipping
0€ Orders over 150€
*18€ orders under 149€
North Europe express shipping
0€ Orders over 160€
*20€ orders under 159€
Ireland, Norway, UK normal shipping
0€ Orders over 60€
*6€ orders under 59€
Rest of the world normal shipping
0€ Orders over 180€
*25€ orders under 179€
Shipping costs can be confirmed in your shopping cart.
For additional shipping methods, please reach out through info@kannabia.com.


*Your coupon will be sent via email.

*Should you have any question, comment or feedback, please do not hesitate to contact us.